Did you ever notice how people when the see advertisements tend to either:
1. Believe everything that's shown or
2. Believe only part of what is shown.
Well, I think this has to do with the fact that advertisers tend to (un)intentionally blur the facts to promote their products. I say that because it is not always don't intentionally, but sometimes, it is because of difference of opinion between individuals. Besides the utility of a certain product/feature, is entirely subjective and depends on the individual under question.
I think we sometimes wrongly blame marketing people for their (mis)doings, but I do believe that they need to get their act together and try and stay as close to reality as possible.
The thing with ads is that you can't have an enticing ad that is just factual. It needs to have some sort of feeling or direction to it and that isn't achievable by just spitting out the facts. People sometimes need to be told what use a toothbrush would be to them. You can't just highlight the features of a toothbrush without moping around the teeth, gums and bacteria aspect.
I think advertising will really come of age when advertisers learn to maintain the right balance.
Sunday, November 30, 2008
Tnirwahtg gogole's ad "feraute"
I was tihnnikg auobt goolge and all the ad ruenvee it geaenerts and
all the ixndees it mannitias and all our dtaa taht it ixndees and
mekas alabalive for popele to secrah and fnid. Waht if "what if" I had
this piece of data taht I didn't wnat any srcaeh eignne to be able to
unrntesdad and yet allow poelpe to be albe to read. No ads geeaetrnd
besad on the cnentot, but yet ppeole can raed it. Iesrriceptve of the
robots.txt file, the data souhld NOT be ietpntrered in a viald faoihsn
by mniehcas. Mybae tihs isn't a lnog trem sooutiln, but it sure wroks
for now! Now only if I can find a vliad use for it :-p
If you wnat the spcrit, send me an eiaml at "dhruv \bbird@" + "google"[0] + "mail.com"
Sunday, November 09, 2008
Mummy's "Jeeradu" masala
"Jeeradu" is a masala that we use to flavour our buttermilk and lemon juice. You can add it as-is to buttermilk and optionally sweeten it with sugar. You can also add this masala to a glass of lime juice along with sugar and optionally some salt to get a refreshingly fresh drink!
Mix up all the above ingredients well, and use about 1/2tsp per cup of the drink required!
| Jeera(Cumin seed) powder: | 1 unit |
| Dry Ginger powder(Soonth): | 1 unit |
| Black(Rock) salt powder: | 3/4th unit |
| Table salt powder: | 1/2 unit |
Mix up all the above ingredients well, and use about 1/2tsp per cup of the drink required!
Nani's Chai Masala
This is the recipe for the chai masala that makes my chai what it is! It has been passed on to my mother from her mother(my nani) and now to me....
Ingredients:
1 cup is 240ml.
1 Tbsp is 15ml.
I grind the cardamom along with their skin. This adds taste and also saves a lot of effort!
Just mix up all the powders given above well and use it in you tea. Approximately 1/4th tsp. for 2 cups is what I use. You can always experiment and find out what works best for you!
Ingredients:
| Cinnamon Powder: | 3/4th Tbsp. |
| Clove Powder: | 1/2 cup |
| Black Peppercorn Powder: | 1 cup -(minus) 1 Tbsp. |
| Cardamom Powder: | 3/5th Cup(60% of a cup) |
| Ginger Powder(Soonth): | 2 cups |
1 cup is 240ml.
1 Tbsp is 15ml.
I grind the cardamom along with their skin. This adds taste and also saves a lot of effort!
Just mix up all the powders given above well and use it in you tea. Approximately 1/4th tsp. for 2 cups is what I use. You can always experiment and find out what works best for you!
Wednesday, November 05, 2008
Dadi's Rava Sheera
This is a sheera which I can never get enough of. Every time my Granny(Dadi) makes it, I am the first person to have it hot and fresh, and I have about 10 pieces in the average on the first harvest ;-)
I saw her making it once, and here is the recipe for this mouth-watering dish....
Ingredients:
Procedure:
I saw her making it once, and here is the recipe for this mouth-watering dish....
Ingredients:
| Rava(Semolina): | 1 cup |
| Cow's Ghee(Clarified Butter): | 1/2 - 1/3 cup |
| Sultanas(Raisins): | 20 - 25 nos. |
| Boiling Water: | 3 cups |
| Powdered Kesar: | 1/2 tsp |
| Grain Sugar: | 1 1/4 cup |
| Nutmeg(jaifad) powder: | 1/8 tsp |
| Cardamom(elaichi) powder: | 1/2 tsp |
| Badam &Pista powder: | 1 Tbsp |
Procedure:
- On a medium-low flame, heat the ghee, and when a little hot, add the rava.
- Boil 3 cups of water
- When the Ghee starts separating from the mixture, reduce the flame to low &add sultanas. Keep stirring till the sultanas swell up by soaking the Ghee.
- Add boiling water in 3 additions in intervals of 15-20 sec, stirring all the time.
- After a while, the mixture in the pan will stop sticking to the pan. Cook for 30 sec. more and add all the sugar.
- Increase the flame's intensity to medium, stirring all the while.
- When the sugar has dissolved and the water of crystallization has left the sugar, add the powdered saffron to ensure that it is distributed evenly across the product.
- When the mixture in the pan has completely left the pan and is very easy to stir, reduce the flame's intensity again to low.
- Add nutmeg powder and cardamom powder.
- Quickly put the mixture into the settling vessel(typically a thaali or a steel box) and sprinkle the shopped nuts all over. Do NOT press the top of the sheera.
- Let the sheera cool. You can cut it into pieces when warm and enjoy it the most right now!
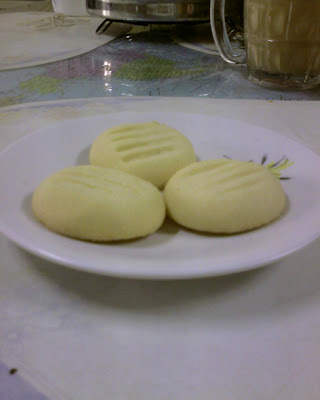
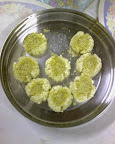
Sujata's Elaichi Nankhatai
I had been searching for a good nankhatai product/recipe but hadn't been able to find one even after trying out many different recipes. I used to always compare it to nankhatai I had had at my nana's place, and none of them would live up to that standard. So, this time I decided to ask my mami, Sujata for the recipe. Here it is in it's unmodified form, and is makes really excellent elaichi nankhatai!
Ingredients:
Procedure:
Ingredients:
| All-purpose flour(Maida): | 1 1/2 cups(170g) |
| Gram flour(besan): | 1/2 cup(45g) |
| Powdered sugar: | 1 cup + 2 Tbsp(175g) |
| Cow's Ghee(Clarified Butter): | 1 cup minus 2 Tbsp = about 210 ml |
| Powdered cardamom: | 1/2 tsp |
| Vanilla extract/essence: | 1 tsp |
Procedure:
- Preheat the oven to 145°C - 150°C. If it is not baked at this temp, then the gram flour(chickpea) will remain uncooked. If you bake it at a greater temperature, then the chickpea will get burnt(overcooked)!
- Mix the maida, besan and elaichi(cardamom) powder well with a spoon for about 5 mins.
- Cream the Ghee and sugar just until they are mixed well.
- Add the flour mixture to the creamed mixture and mix using a wooden spoon or a spatula.
- Lightly knead into a smooth dough.
- Make small roundlets, place on the baking sheet and make a design on top with a fork. Or you could place a single charoli nut on each roundlet.
- Bake for 30 mins or less(till done). The cookies will feel silky smooth and the flour will peel off from the sided, but they are actually done.
- Cool and enjoy!
Dhruv's favourite Mava Cake!!!!
This is a cake that I truly relish and enjoy and I make using my own method. Since I love the cake and other people have also appreciated it, I feel like sharing the recipe....
Ingredients:
You will also need a pan that is 25 sq. inches in area and at least 2 inches tall. I use a 7.3" X 3.5" X 4" bread tin.
Procedure:
Ingredients:
| Maida(all purpose flour): | 80 g |
| Mava(grated): | 40 g |
| Grain sugar: | 115g |
| Cardamom powder: | 1/2 tsp |
| Powdered Saffron: | 1/4 tsp |
| Vanilla essence: | 1/4 tsp |
| Eggs: | 2 nos. |
| Baking powder: | 1/4 tsp |
| Hot Water: | 2 1/2 Tbsp |
| Powdered dry fruits(pista and badam): | 2 Tbsp |
| Melted butter(salted): | 50 g |
| Vegetable Oil: | 3 Tbsp |
You will also need a pan that is 25 sq. inches in area and at least 2 inches tall. I use a 7.3" X 3.5" X 4" bread tin.
Procedure:
- To prepare the pan, grease the pan, line it with parchment paper and then grease it again.
- Preheat your oven to 180°C.
- Mix the grated mava, flour, cardamom powder and paking powder very well with a spoon. Stir well for 5 mins to mix.
- Take the sugar in a bowl and break the 2 eggs in it.
- Mix the melted butter and oil in a separate vessel.
- Warm the saffron strands and grind into a powder.
- Add the powdered saffron to the butter & oil mixture and mix well.
- Heat 2 cups of water to a boil and turn off the flame. Set the egg container over boiling water(do not touch the base of the container to the water) and beat well till stiff peaks form.
- Add the vanilla essence and beat a little more.
- Add the 3 Tbsp of Hot water to the beaten eggs.
- Add about 3 Tbsp of flour mixture to the well beaten eggs and mix by stirring at the base. Take care NOT to over-mix or you will deflate the batter.
- Add the melted butter & oil mixture. Mix a little.
- Add the remaining flour and the powdered nuts and mix in using the same procedure taking care not to over-mix and deflate the batter. Work in small but quick strokes.
- Pour the batter into the pan and bake for about 50 mins. or till the cake is done. Test with either a toothpick or by touching the surface of the cake. A toothpick inserted should come out clean, or the surface should feel done(spongy, but not soft).
Tuesday, November 04, 2008
Mom's Gujarati Kadhi
This is the recipe for Gujarati Kadhi; the way my mom makes it. I have started liking this dish off late. Kadhi is usually accompanied by Khidchi but we have it as-is or with Steamed Rice or Steamed Jeera Rice.
Ingredients:
Procedure:
Ingredients:
| Green Chillies: | 2, sliced lengthwise and de-seeded |
| Dahi: | 1 - 1 1/2 cups |
| Besan(Gram Flour): | 2 - 3 Tbsp |
| Ginger Paste: | 2 tsp |
| Kadi Patta: | Leaves of 4-5 sticks |
| Water: | (1/2 + 1/2 + 3) cups = 4 cups(960 ml) |
| Jeera(Cumin Seeds): | 2 tsp |
| Vegetable Oil(or Butter or Ghee): | 1 1/2 Tbsp |
| Hing(Compounded Asafoetida) powder: | 1/2 tsp |
| Salt: | To taste(or 3/4 - 1 tsp) |
| Jaggery: | 2 - 2 1/2 Tbsp |
| Fresh Corriander leaves: | A fistful(for seasoning) |
| Sugar: | 1 1/2 tsp |
Procedure:
- Add Besan to dahi. Add ginger paste to it.
- Add 1/2 cup water to the above mixture and it in mix with a mandhiani(apparatus used to make buttermilk from curds). When mixed well, add remaining water and wash the mandhiani.
- Saute chillies, kadi patta, hing and jeera in the oil.
- Make sure gas is on medium.
- Add the flour & curds liquid to the above and add the remaining water to it to adjust the kadhi's consistency. The mixture will thicken on cooking because of the gram flour(besan). Keep stirring the mixture to prevent sticking at the base.
- When the kadhi starts to boil, reduce the flame to slow and keep cooking for about 20 mins more. It is done when kadhi doesn't spill over when the flame's intensity in increased. Cook it sufficiently well or else kadhi will remain uncooked and will taste bad.
- Now, add the jaggery to it and stir in till dissolved. Add jaggery ONLY after the besan is cooked well.
- Add sugar to taste.
- Serve and enjoy!
Monday, September 22, 2008
Better than Kayani Shrewsbury Biscuits
After trying out many recipes and buying Shrewsbury biscuits from many more bakeries and shops, I have finally found a recipe that not only matches the Kayani Shrewsbury biscuits, but I would venture out to say "results in biscuits that are tastier than the ones at Kayani!!!!"
Here we go:
Ingredients:
o 100g Powder sugar(you can grind grain sugar for 5-10 sec to get this)
o 150g Pure salted Butter(I use Amul)
o 200g Refined flour(also called Maida or All-Purpose Flour)
Procedure:
1. Pre-heat the oven to 150°C.
2. Start off with butter right from the refrigerator and cream it till it is not solid.
3. Cream the butter and sugar just until the sugar is mixed with the butter.
4. Add the flour in one go, and use a cut & fold motion of the spatula to incorporate the flour.
5. Refrigerate for 5-10 min if the dough is oozing with butter.
6. Lightly knead the dough to form a smooth dough.
7. Refrigerate again if required.
8. Make about 24 equal sized balls and place them on a baking tray.
9. Flatten out just a little bit with a fork to form a "peda" like ball.
10. Place in pre-heated oven for 30 mins.
11. Enjoy!!!!
Tuesday, September 16, 2008
(For me,) Culture is:
unsaid, unspoken
questioned and found to be true
using makkhan and ghee
fresh garam masala
learning from mother
not a photograph
unexpressable, undescribable
knowing how to feed your baby
years of experimentation and knowledge
bundled into a neat package
more trustworthy than science at times
discovering the known
respecting your elders
a series of mutations
a never-ending process
something that transcends education but is akin to it
indestructible
being misunderstood by people today
underrated
taken too literally
knowing what nani used to make for mummy
using a mortar and pestle
more than The Flintstones
older than The Flintstones
not just a chapter in history, but my extended past
mine to give to the future
For me, culture is what it is....
Wednesday, September 03, 2008
About Yeast.
I was baking a loaf of bread, and for some reason, it didn't turn out as voluminous as it should have, so I decided to investigate what the problem was. The 2 loaves I had baked earlier too were not quite up to the mark so my suspicion fell on the yeast that I was using. I use fresh baker's/cake yeast, and it goes bad really fast. It has a refrigerated shelf life of about 3 weeks, but I had stored it in the deep freezer so that it was stored frozen. Baker's yeast can be stored frozen up to 6 months. The yeast I had was about 5 weeks old and had changed in both colour as well as texture.
Baker's or Fresh Yeast that you get in India is basically cake yeast which is available in cuboids starting from 500g. It costs Rs. 30 for 500g, and Rs. 56 for 1 kg. The brand I buy is called "Tower". Now this yeast when fresh has a creamish-yellow colour, and has a crumbly texture. i.e. It should crumble easily when you try to crumble it. If the colour changes to a somewhat darker shade and the texture becomes more paste-like(and hence does not crumble), it means your yeast has been working and is probably "tired". I do NOT know how to check yeast for tiredness because this "tired" yeast when mixed with sugar and water WILL bubble, but when you make bread, won't give a good second rise. And that is exactly what happened with me. I had stored a small amount of yeast in the refrigerator in what I thought was an air-tight container, but it was letting water vapour in so that was what had tired out the yeast. So when you start making bread, make sure your fresh yeast is creamish-yellow in colour and crumbly in texture. Also if it is tried out, it will smell very beerish(will smell of alcohol). Fresh yeast should have a yeasty smell and not a beery smell.
Storage: As far as storage is concerned, this is what I do. I buy about 250g of yeast(enough to make about 20-25 loaves of 400g bread; 300g flour and rest water) and store it in the deep freezer in an air-tight plastic wrap. Every few weeks, I remove about 1/5th the yeast and transfer it into an air-tight plastic box to store in the refrigerator. This is because frozen yeast does not crumble. Also before breaking off the yeast, I leave it in the refrigerator to thaw for at least 6 hours after removing it from the deep freezer.
Sunday, August 24, 2008
How to make chocolate from cocoa powder at home.
I always buy cooking chocolate from shops, and I have noticed that all of them have "hydrogenated vegetable oil" or their equivalents mentioned in the ingredient list. Now, I'm not a big fan of using products that contain fully/partially hydrogenated vegetable oils, so I've long been on the look out for chocolates that do not contain these ingredients. However, on searching, I haven't been able to find any with just a few basic ingredients. The ones that don't contain hydrogenated oils are too expensive because of the high cost of cocoa butter. Also, being in India, where the climate is generally about 33°C - 36°C, manufacturers use Hydrogenated Vegetable Oils to keep the chocolate from melting at room temperature(which is why "foreign" chocolates are generally deformed when we buy them in India).
I have been experimenting, and have found that the following procedure produces good quality bitter chocolate, which I enjoy eating.
Ingredients:
Procedure:
Note: If you want to add more cocoa powder or you find that you are not getting a shiny pourable liquid, you may want to try adding an emulsifier such as "soya lecithin" or "egg yolk" in a proportionate amount, a little at a time, stirring constantly till you get a liquid with a smooth consistency.
I have been experimenting, and have found that the following procedure produces good quality bitter chocolate, which I enjoy eating.
Ingredients:
- 1 unit Melted Unsalted Butter
- 1 unit powdered/pulverised sugar(not Icing sugar), or to taste
- 3 units good quality cocoa powder(I use Cadbury or Hershey's), or to taste
Procedure:
- Melt the Butter, and add all the sugar to it.
- Simmer the butter with the sugar for some time so that sugar is completely melted in the butter and some of the water has vaporised. Keep stirring with a thin wire whisk.
- Remove from the heat.
- Add the cocoa powder a little at a time(preferably in 4~5 batches), stirring all the time with a thin wire whisk, to ensure that no lumps form.
- Add as much cocoa powder as is required(to taste) or to adjust the consistency of the mixture to be like a thick syrup, which can be poured into molds when it is hot/warm.
- You may optionally add vanilla extract for extra flavor. Add only about 1/4tsp for every 100g of butter(or 500g chocolate) or to taste.
- Pour into molds and chill in a refrigerator for about 2 hrs. or till completely solidified.
- Eat directly or use as cooking chocolate or make a hot cup of hot chocolate. Enjoy!
Note: If you want to add more cocoa powder or you find that you are not getting a shiny pourable liquid, you may want to try adding an emulsifier such as "soya lecithin" or "egg yolk" in a proportionate amount, a little at a time, stirring constantly till you get a liquid with a smooth consistency.
Tuesday, July 22, 2008
Wheat Pav
This is the recipe for Pav made from half maida(all-purpose flour) and half aata(whole wheat flour).
Ingredients:
Procedure:
Link to photos:
http://picasaweb.google.com/dhruvbird/WheatPav
Ingredients:
- 140g Maida
- 140g Aata
- 10g fresh yeast(crumbled)
- 15g granular sugar
- 10g Pure Cow's Ghee
- 1 tsp. table salt
- 2 tsp. melted butter(preferably salted; Amul butter)
- Some water
Procedure:
- Mix the maida and aata, and make a well.
- Put the yeast and granular sugar.
- Add a bit of water to just cover the yeast and sugar mixture. You should see some bubbles some time after adding water. This is the CO2 expelled by the yeast on eating the sugar in the presence of moisture(water in this case).
- Make a dough and keep adding water till the dough "just" starts sticking a little bit. The trick is to add just enough water so that (a) the dough is workable and (b) the water should be in good enough quantity so that the dough is not "dry". So the balance is reached when you realize that adding more water will make it sticky and very difficult to work with.
- Cream the Ghee and salt well.
- Knead this mixture into the dough. The dough will now stop sticking to your hand till all the fat is incorporated into the dough. Try to knead it as much as possible, because once the fat is incorporated, it will start sticking again. This will take approx. 7-8 mins. depending upon your speed. Try to work fast. There reason we add a sufficient quantity of water is because we want a soft dough and some protection against over-baking.
- Make a big smooth round and keep it on a slightly greased surface(grease with with ghee) to prevent sticking of the dough to the surface. Cover with a moist cloth and let it rise in a draft-free place till it approximately doubles in size. It will take about 25-35mins.
- Divide the dough into 9 equal parts(do NOT stretch the dough. Use a knife or dough scraper to cut) and make rounds. Use "very" little of dusting flour(aata or maida) if the dough sticks to your hand.
- Set your oven temperature to 210C and set it to pre-heat.
- Line the rounds in a 3x3 grid, cover with a moist cloth, and place them in a draft-free place to let them again double in size. Approx. 35-50 mins.
- Place the tray in the oven, and bake till you get a nice brown top on each "Pav". This will take about 8 mins. but keep a close eye. It may take +/- 2mins. depending on the temperature error in your oven and the size and aeration of the oven.
- You can(to be on the safer side) over-bake for about 1 min. by turning off the TOP header coil so that the buns get cooked well, and the browning of the tops is unaffected. (Remember we used sufficient water?)
- The buns are done when you hear a "hollow" sound when you tap them on the top. Don't worry if the tops feel really hard. They are supposed to be that way. Now quickly, using a brush, apply the melted butter evenly and uniformly on top of each of the buns. This will soften the tops and give them a nice shiny finish.
- Don't forget to remove them from the baking tray and keep them on a "wire-rack" to cool off or else the bottoms will get soggy from the condensed moisture!
Link to photos:
http://picasaweb.google.com/dhruvbird/WheatPav
Sunday, June 29, 2008
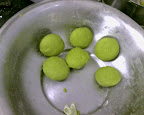
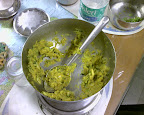
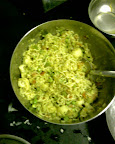
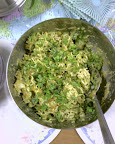
Palak Beetwala
This is a dish I made in a hurry using lost of ingredients that were just lying around, and would have caught fungus if I hadn't used them. So, the previous night I had boiled 2 beetroots and 1 potato and they were lying in the refrigerator. We had 1 bunch of fresh palak(spinach) too, so I decided to make something out of it. I've named it Palak Beetwala after it's main ingredients. Easy enough for anyone to figure out what it may contain....
Ingredients:
Procedure:
You can use the excess water that is drained off for other cooking purposes, to make bread, or as I do, add some dhania(corriander) powder, jeera powder, rock salt and table salt and drink up!
Serving suggestions: You can serve this dish with either chapati or as a soup with poached egg in the bowl. The runny egg yolk in the poached egg will enrich the taste of this dish.
Ingredients:
- 1 bunch palak(spinach), thoroughly cleaned
- 2 small beetroots, boiled, peeled and cut into small pieces
- 1 medium potato, boiled, peeled and cut into small pieces
- 1 tomato, cut into small pieces
- 1 small/medium onion, finely chopped
- 1/4 tsp Hing powder(asafoetida)
- 1/2 tsp Jeera(cumin seeds)
- 1 clove garlic, peeled and finely sliced
- 1 tsp finely ground ginger
- 1/2 tsp Haldi(turmeric powder)
- 1 tbsp butter(salted/unsalted)
- Salt to taste(about 1/2 tsp)
Procedure:
- Take the Palak and add water just so that all the palak is immersed when you press down a bit. Boil it till the palak feels tender. The trick to boiling palak is to cook it on a medium-high flame instead of a low flame. This will prevent the green colour of the palak from fading away. Also cover it while cooking with a lid to prevent excessive oxidation which will again result in fading of the green colour.
- Remove the palak from the water(Do NOT throw away the water. It will be used later in the recipe and is quite nutritious) and put it into a food processor(mixer in India). Also add the tomato and beet pieces to it. Run mixer for about a minute or till the mixture is semi-solid(not a completely thin paste).
- Take a skillet and melt the butter in it. Heat the butter till it sizzles.
- Add the hing powder and jeera.
- Add onions and saute till they become golden-brown in colour.
- Add the garlic and ginger paste and mix well.
- Add the palak paste and potato pieces. Keep stirring to cook well. Add some of the water in which the palak was boiled to adjust the consistency of the mixture to something more desirable.
- Add the haldi powder and salt and stir to mix well. Taste the mixture and adjust salt or other spices as per your taste.
- Boil on low flame for about 10min or until desired consistency is reached.
- Serves 3.
You can use the excess water that is drained off for other cooking purposes, to make bread, or as I do, add some dhania(corriander) powder, jeera powder, rock salt and table salt and drink up!
Serving suggestions: You can serve this dish with either chapati or as a soup with poached egg in the bowl. The runny egg yolk in the poached egg will enrich the taste of this dish.
Thursday, May 29, 2008
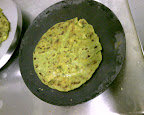
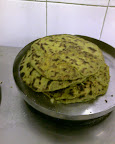
Masala Bhaji Parantha
Today, we'll see how to make Masala Bhaji Parantha. The name encodes everything that this dish contains:
Total Time: 1 hour 30 minutes
Serves: 8-9
Ingredients:
Special equipment required:
Procedure:
- Masala: Any Masala. I used Pav Bhaji Masala.
- Bhaji: A mixture of vegetables. I used cabbage, cauliflower, potatoes and onions.
- Parantha: A covering of wheat flour knead into a dough, and flattened into a roti like shape.
Total Time: 1 hour 30 minutes
Serves: 8-9
Ingredients:
- Pre-knead dough for making about 8 chapatis
- 1 large potato
- 1/4 cabbage, thinly sliced
- 1 large onion, cut into fine pieces
- 1/3 cauliflower
- Salt
- 2 tsp Pav Bhaji masala
- 2 Pinch Asafoetida(Hing)
- 1 tsp Ginger paste
- 2 garlic cloves, cut into fine pieces
- 1 1/2 Tbsp Butter(salted/unsalted)
- 1/3 tsp Turmeric powder(Haldi)
- 9 Tbsp Ghee or Vegetable oil(approx.)
Special equipment required:
- A potato masher
Procedure:
- Make about 8-9 small balls from the pre-knead chapati dough. You may optionally colour and flavour it by adding haldi(or pudina[mint] paste) and salt -- to taste.
- Roll these into chapatis. Keep aside.
- Boil the potato and all the vegetables(except the onion). You may add some salt in the water so that the vegetables soften faster.
- Once boiled, drain out most of the water. We will need some(about 1/4 cup) to cook the vegetables.
- Peel the potato.
- Heat butter in a pan, and add Hing to it.
- Saute the onions till they are light golden in colour.
- Add the ginger paste and garlic pieces. Mix well for a few seconds.
- Add the vegetables, and add the pav bhaji masala, haldi and salt to taste.
- Cook for a few minutes till all the water has evaporated and the vegetables are dry. Keep stirring or the vegetables will get burnt.
- Now use the masher and mash all the vegetables in the mixture above.
- Let this mixture cool for a while under the fan. As the mixture cools, it will also thicken a bit. This will help us in used it as a filling for the paranthas.
- Now use this as a filling for the paranthas, and again roll them into slightly thick paranthas.
- To fry, heat a thick tawa(roti pan) till it is completely and evenly heated up. Spread a little bit of ghee on it evenly.
- Reduce the flame to medium-low.
- Now spread the parantha on it, and sprinkle the sides with ghee. This should be about 1/4 tsp.
- When it feels done, use around 1/4 tsp ghee to coat the top side.
- Over-turn the parantha and sprinkle this side too with 1/4 tsp ghee.
- Use the rest of the ghee to cover the now top-side with ghee./li>
- When it is done, over-turn once again, check for doneness on both sides, and serve.


Tuesday, May 27, 2008
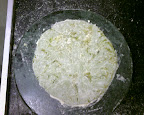
Sondesh
I started out making Doodh Peds, but the milk curdled, so I converted it into Sondesh. This is a bit different from Malai Peda, because the milk hadn't halved in volume when it curdled, so it is actually very close to a Sondesh.
Serves: 9 pieces.
Ingredients:
Procedure:

Serves: 9 pieces.
Ingredients:
- 1 ltr High Fat(bhains ka doodh -- buffalo milk)
- 1/2 lemon
- 125g granulated sugar
- 1 1/2 pinch kesar(saffron) strands
- 20 g(approx.) ground pista and badam(it should be quite grainy)
Procedure:
- Warm the saffron strands a bit so that they crumble easily.
- Grind them into powder and add about 1 Tbsp of warm milk so that they dissolve completely. You should get a bright yellow coloured mixture.
- Take milk in a large saucepan and heat on high flame, stirring continuously till it is boiling hot.
- Remove seeds from lemon and squeeze juice over the milk to completely curdle it.
- Heat for a while till the milk separates completely.
- Strain out all the water with the help of a strainer, or as is more traditionally done, by putting the entire thing in a cloth towel, and squeezing the towel hard to remove all the water.
- Place the paneer in the saucepan.
- When it is still quite warm, break into small pieces, add sugar, kesar syrup and mix well.
- Form small roundlets about 1 1/2 inch in diameter, and male a small depression in the center(The pedas will be quite crumbly, so be careful while to pinch depressions in them).
- Put the ground badam and pista in these depressions, and press so that they stick.
- Refrigerate till cool, or serve warm and fresh.
Hitchhiker's Noodles
Today I'm going to detail the recipe for Hitchhiker's Noodles which is a dish I just came up with. I eat noodles when I'm out of town or have a crunch situation in which to make something edible, or am in a mood to experiment with vegetables but don't want to make chapatis.
These noodles are called Hitchhiker's Noodles because they are supposed to be for the Hitchhiker -- quick easy and cheap to make.
There are 4 main steps to making these noodles:
Let's discuss each one of them in detail:
Now that we know the basic framework of the recipe, let's discuss the the recipe itself:
Cooking time: 42 minutes
Serves: 2
Ingredients:
Procedure:
Variations:
I hope you enjoy cooking and experimenting with this recipe, and I wish you all the best :-)
These noodles are called Hitchhiker's Noodles because they are supposed to be for the Hitchhiker -- quick easy and cheap to make.
There are 4 main steps to making these noodles:
- Cook the noodles
- Cook the gravy
- Boil the the vegetables
- Mix the above, add sauce and garnish to serve
Let's discuss each one of them in detail:
- Cook the noodles: You may use any flavour noodles. I generally use Masala flavour Top Ramen or Maggi noodles.
- Cook the gravy: The gravy can be any gravy of your choice. I have used a tomato and egg based gravy, which is both tasty and healthy. Tomatoes and eggs are generally very widely and freely available(even on other planets!!!! ;-))
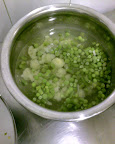
- Boil the vegetables: You may choose any combination of vegetables to add to the dish. I chose Cauliflower, Peas, and French Beans.
- Mix, sauce, garnish and serve: You need to properly mix up the individual constituents of the dish discussed above, and add sauce and mix again. Top off with your choice of garnish, and serve....
Now that we know the basic framework of the recipe, let's discuss the the recipe itself:
Cooking time: 42 minutes
Serves: 2
Ingredients:
- 1 packet(80g) Top Ramen Masala flavour noodles
- 1 1/2 Tbsp Butter(salted/unsalted)
- 1 onion, finely chopped
- 1 medium green capsicum, finely chopped
- 2 tomatoes, coarsely chopped
- 1 Tbsp Ginger paste
- 1 large Garlic clove, finely chopped
- 2 Pinch Asafoetida(Hing) powder
- 1 egg
- 1 Tbsp Pudina(Mint) paste
- 50g Cauliflower
- 40g Peas
- 50g French Beans
- Salt
- 1 tsp Soya Sauce(or to taste)
- 1 1/2 tbsp Tomato ketchup(or to taste)
- Fistful Coriander leaves for garnish
Procedure:
- Cook the Noodles as indicated on the packet. Add the flavouring when half the water has evaporated and mix well. Let some water remain after cooking so that the noodles can soak up the flavoured water. This will enhance the noodles' flavour.
- Remove from the heat and let them stand.
- Break the egg, and beat it for a few seconds till the white and yellow are mixed up well. Set aside.
- In a separate pan, add all the chopped up vegetables and put water so that all the vegetables are completely immersed in water. Add a teaspoon of salt(for faster cooking), and set aside to boil on a medium flame.
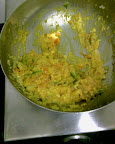
- In a separate pan, put the Butter, and when it is frothing hot, add the Hing and saute the onions till they are golden in colour.
- Add the Ginger paste and garlic and mix it up well.
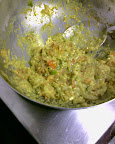
- Add the finely chopped capsicum pieces till they are coated with butter.
- Add the tomato pieces, and salt to taste and cover with a lid. Cook on a low flame till the water in the tomatoes starts leaving it.
- Remove lid, and stir while cooking till most of the water from the tomatoes has evaporated.
- Now add the egg to the pan with the tomatoes. Keep stirring till the eggs are cooked. You may increase the flame to medium so that the egg gets cooked well, and the proteins coagulate. You will find that the egg will form a gravy with the moisture in the tomatoes. If we had used more eggs, we would have gotten scrambled eggs or bhurjee.
- Add the mint paste, and mix well. Turn off the flame, and set aside.
- Check if the vegetables have been boiled al dente. Once done, drain out all the water(and along with it, lots of the nutrients of the vegetables) and add it to the noodles.
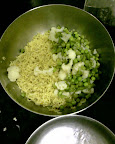
- Now add the gravy we made to the noodles, and mix them all up well. Check the mixture. Add more salt if required.
- Add soya sauce, and tomato ketchup and mix it up well.
- Garnish with coriander leaves and serve in style ;-)


Variations:
- You may also add ajwain along with the Hing in the vaghaar(tadkaa) for a more aromatic flavour
- You may add more vegetables like carrots, cabbage. However, avoid using vegetables like cucumber, zucchini, sweet gourd(galka) since they give off lots of water, which will be lost when you drain off the water.
- Typically, each vegetable needs different amounts of time to cook properly. Peas cook fastest, followed by cauliflower, followed by french beans. So, expect your peas to be slightly over-cooked, your cauliflower to be cooked just right, and the french beans to be slightly under-cooked. It is the way it should be since this is a poor man's recipe. If you have the time, go ahead and cook them all separately.
I hope you enjoy cooking and experimenting with this recipe, and I wish you all the best :-)
Sunday, May 25, 2008
Make like a shrink
I've come to believe that most people can be classified into 2 categories based on their concentration span. I assume that everyone in the Universal Set of people has something to offer to everyone around them, no matter how little it may be. So, the 2 broad categories based on concentration span would be:
1. Those who can concentrate on something for long periods of time.
2. Those who can concentrate on something only for a short period of time.
I have further noticed that generally, the product concentration(C) X concentration span(CS) is constant over a large set of people.
So, if C X CS is constant(K), then, it would imply that people falling into category [1] don't concentrate very hard on what they are doing, but do it for longer(marathon athletes), whereas those falling into category [2] concentrate really hard on short bursts(short distance sprinters).
I think these basic differences dictate as a person what job you are most suited for. For example, managers and overseers of tasks could fall into category [1] whereas inventors into category [2]. Say you are working on building a large system. You would need someone from [1] to look after the general progress and well-being of the system, whereas you would also need someone from [2] to provide the much needed pushes at vital stages of the project when it is stuck or in need of an idea.
I think that if people try to cross these barriers and try to choose careers that violate this basic underlying trait of theirs, then they would find it very difficult to adapt to their job, and would feel under-qualified as compared to their peers who are from the suitable category of candidates.
Ambrosial Candy -- a tale of East v/s West.
I've been learning to make sweets of both the western and eastern(Indian) types. Westers sweets include cakes, breads, pies, and different types of pastries, etc.... Indian sweets include mawa, ghee and sugar based sweets such as Mysore Pak, Gud Papdi, Mohanthaal, laddu, etc....
The primary difference(from the little exposure I've had to both) between these sweet making paradigms I've noticed are the following:
The primary difference(from the little exposure I've had to both) between these sweet making paradigms I've noticed are the following:
| Parameter | Western | Indian |
|---|---|---|
| Basic Ingredient | Flour, sugar, eggs | Sugar, Ghee. Indian sweets are broadly classified further into either milk based or flour based, in which case a variety of flours are used |
| Preparation time | Moderate | Low |
| Cooking time | Moderate/Low | High |
| Sensitivity to change in ingredient proportion | Very High | Low/Moderate |
| Sensitivity to change in cooking time | Moderate/Low | Very High |
| Number of Ingredients | Generally around 10 | Generally less than 5 |
| Heating Method | Using Oven | Using Stove |
| Shelf life of product | Depends upon the product | Depends upon the product |
| Concentration required during preparation | Moderate/Low | Very High. You can not leave the working area while the dish is being made |
| Fat content | Moderate/Low | High/Very High |
| Principle technique | Leavening | High temperature roasting in liquid |
| Artificial Ingredients | May contain in the form of Baking Soda, Baking Powder, Cream of Tartar, etc.... | Should not contain. However, commercial sweet vendors generally use Hydorgenated Vegetable Oil(which is not good for health) instead of Pure Ghee these days |
Sweets.... should we buy them?
I've been trying to work out the costing of producing one of my favourite(and first Indian sweet I learned to make) Indian sweets, the famous Mysore Pak. Shops sell it for as much as Rs. 140/- a kg. However, armed with the knowledge that 4.5 units of the sweet require 2 units of Ghee(clarified butter), 1 unit of besan, and 1.5 units of Sugar I decided to work things out for myself.
For 1 kg of Mysore Pak, you need:
450g Ghee
225g Besan
330g Sugar
The rates of the items are as follows:
Ghee: Rs 100 for 500g
Besan: Rs 25 for 500g
Sugar: Rs 20 for 1000g
That means 1kg of Mysore Pak will cost(for the ingredients alone):
Ghee: Rs. 90
Besan: Rs 11
Sugar: Rs 6
Total cost of ingredients: Rs. 107.
Lets take cost of production to be about Rs. 8 per kg(fuel, labour, transport, etc....)
So, the total cost per kg is now Rs. 115.
The profit per kg is just Rs. 25!!!! And this is not including the cost for renting the shop and electricity bills, etc....
Surely the shop keepers must be making more money. The food industry is known to have a profit margin of at least 100%. the only way they can do this is by cutting down on the cost of the most expensive ingredient -- Ghee. It is most commonly substituted in India by Dalda(Hydrogenated Vegetable Oil[HVO]). However, it should be known that Dalda has very detrimental effects on human and animal health. Just search for "Hydrogenated vegetable oil" and you'll get many hits on your favourite search engine.
To cut a long story short, Dalda contains Trans-Fatty acids, which are not easily absorbed by the body, and they are comparable to "plastics" in the body which stick around for long. These are the equivalent of foreign substances in the body and lead to many diseases. So, please think twice before buying sweets from an un-trusted shop.
Notes:
- Actual incident: I went to a sweet shop asking for unsalted butter(makkhan) and the shopkeeper said that they generally cream the milk and use the butter at home(I could see he wasn't lying from the size of his waist-line).
- Pune Cow's Ghee can cost anywhere from 180 to 200 per kg, while Dalda costs anywhere from 110 to 130 per kg. It is a saving of about 40% as compared to using Ghee. Who knows if the shopkeepers are further cutting costs by using inferior quality HVO?
- Interesting aside: Dalda Ghee costs less than Dalda brand cooking oil!!!! When in fact the Ghee is Hydrogenated Vegetable Oil. What do you think makes up that extra weight and cost of production of Ghee from the oil(palm oil)?
http://en.wikipedia.org/wiki/Palm_oil#Health
Saving Electricity
With oil touching $135 a barrel, and rising electricity costs in major cities, I thought it would be good to figure out how to keep those bills down.
My friend has a collection of environment-philic blogs/pages on the web that he has collected and placed here: http://geek-o-pedia.blogspot.com/search/label/Environment?max-results=100
- Turn off the switch on your phone's charger, and don't just remove the phone from the charger.
- Use room temperature water for bathing, esp. in this weather.
- Electricity costs more with more units used, much like taxes.
- Watch your computer usage. Turn off your PC(esp monitors) when not in use. Don't use screen savers.
http://michaelbluejay.com/electricity/computers.html
http://www.answerbag.com/q_view/39698 - If you have a habbit of falling asleep while watching TV, use that "auto off timer" on your TV. Most TVs these days have it. Read the manual.
- (For India) Turn off your CAS box if you have one.
- Turn off the monitor when not in use.
- Use power-saving lamps(CFLs)
http://en.wikipedia.org/wiki/Compact_fluorescent_lamp - Use Electronic chokes instead of the traditional induction types. They save up to 40% electricity.
- Make sure that there is at least 6 inches separation between the refrigerator and the wall behind it. It helps the air circulate and hence the heat dissipation from the coils.
- Use an electronic fan regulator v/s the traditional rheostat type which converts some of it's energy to heat to perform the function of a resistor(hence the heating of the regulator when you run the fan on low speeds for too long).
- Last but not the least -- please turn off the lights, fans, etc.... when leaving the room.
My friend has a collection of environment-philic blogs/pages on the web that he has collected and placed here: http://geek-o-pedia.blogspot.com/search/label/Environment?max-results=100
Thursday, May 15, 2008
Mysore Pak
I'm sure if you've come here, it is in search of the perfect Mysore Pak Recipe. I myself had been hunting for it for a while, and it took me as much as 6 attempts to finally get one that I liked eating. The recipe mentioned here will result in a firm Mysore Pak, that is crumbly enough to melt in your mouth, and whose cross-section shows 3 distinct layers, with the 2 outer layers being golden-yellow, and the middle one being light-brown. There are many parameters that affect the way the Mysore Pak will turn up. Mysore Pak is made using Gram Flour(besan), sugar syrup, and ghee(clarified butter). Varying the proportions of these ingredients will affect the "quality"(by quality I mean taste and texture) of the produced result. Let's discuss them in detail.
So, my ratio would look something like this:
You may optionally add about 1/2 Tbsp of ground cardamom powder per cup of Besan to the mysore pak for that extra flavour and aroma.
You will need 2 medium sized pans, one large pan for cooking, one large steel plate and one sieve for sieving.
I hope you enjoy making this mouth-watering sweet, and I hope it turns out well. Mysore Pak is a very delicate dish to prepare, and requires precise timing of operations. Remember to not lose your concentration, and always start off with a patient mind :-)
In case you are wondering how I know what happens when you over/under-do something -- well, I've tried it out!!!! And wasted so much of my ingredients doing so.... In case your Mysore Pak has formed a burfi(won't solidity but has a smooth texture), all is not lost. You can still re-heat it (on a medium-low) flame, and keep stirring till you see forthing, and a molten-rock like texture of the mass. Turn off the heat, and let it solidify.
Note:
- Amount of Gram flour: We shall assume this to be kept constant and all other ingredients are chosen relative to this one ingredient.
- Amount of Sugar: This is typically taken to be anywhere between 1 to 2 times the amount of Besan used. More sugar will result in a softer final product. I personally take sugar to be about 1.4 times the amount of Besan used.
- Amount of Ghee: This mainly dictates the fattiness of the sweet. The more ghee you have, the smoother the texture, the more well cooked it will be and the more fatty your final produce will be. The ratio varies anywhere between 1 to 3 times the amount of Besan used. I personally try to restrict it to about 1.5 times the amount of Besan. However, I generally let the recipe dictate how much ghee to add. More on this below. You will also need(extra) 1 Tbsp Ghee per cup of Besan.
- Amount of Water in the sugar: Water should be about 1/4th of the amount of sugar used, or just enough to wet the sugar so that it can be heated uniformly.
So, my ratio would look something like this:
| Besan | Sugar | Ghee | Water |
| 1 | 1.4 | 1.5 | 0.35 |
You may optionally add about 1/2 Tbsp of ground cardamom powder per cup of Besan to the mysore pak for that extra flavour and aroma.
You will need 2 medium sized pans, one large pan for cooking, one large steel plate and one sieve for sieving.
- Take the Ghee and heat it on a low flame till it is really hot.
- Drop about 1 tbsp of this hot Ghee on the besan and mix it well. Roast the Besan and Ghee mixture on a low flame till it starts giving off an aroma.
- Now sieve this mixture so that there are no or very few lumps.
- Take the sugar and the water mixture and heat it on a medium-low flame till it forms a single thread consistency. This can be checked by periodically taking this(very hot) sugar syrup) and pressing it between your index finger and thumb, and trying to separate them slowly. If the syrup at room-temperature(or slightly warmer) forms one single thread, then it is the right consistency. The sugar syrup will be bubbling. It is these air bubbles that the besan will trap and help create the holes in the final product. More viscous mixtures will result in a more crumbly Mysore Pak, and less viscous mixtures won't form as good a texture.
- Now add the sieved Besan to the sugar syrup, and stir till it is completely mixed and there are no lumps. This shouldn't take too long. Less than a minute.
- Add the cardamom to the mixture now if you are using it, because you won't have time later!!!!
- Now, add the very hot Ghee, about 1-2 tbsp at a time to the Besan and sugar mixture, and keep stirring. As the hot ghee falls on this mixture, it cooks the besan because of it's very high temperature, and will form a frothy mass. This is normal.
- Keep stirring continuously, and adding ghee every 20 sec, till the mixture lets go of the pan, and stops absorbing more ghee. This is generally when I stop adding ghee. (I start off with a little more ghee than I think I would need, and save the rest for later.)
- Do NOT let your concentration waver, since this is a very critical period in the preparation of Mysore Pak. Any lapse of concentration now will spell certain doom.
- You need to keep stirring till you see a distinct change in texture and colour of the Besan. The Besan will darken slightly(it will just start changing colour) and will form a thready molten-rock like mass. When this happens, quickly remove the Mysore Pak, and place it into a tray to cool. If you remove the Mysore Pak from the heat too early, then it won't solidify and will form a burfi, and if you heat it for too long, it will over-cook, and lose it's texture and will fail to solidify into a sturdy mass. Instead it will become a gooey mass, which will not solidify.
- (coming back)It will solidify in a few seconds, but will internally continue cooking for about 10 min, or until cooled sufficiently. You will know it is done if you don't hear a spurting/bubbling sound when you put your ear over the Mysore Pak. When you remove the Mysore Pak to cool, it is actually cooking inside because of all the heat trapped in the ghee. It is because of this latent cooking that the Mysore Pak is able to get a light brown center.
- Cut it into pieces and enjoy :-)
I hope you enjoy making this mouth-watering sweet, and I hope it turns out well. Mysore Pak is a very delicate dish to prepare, and requires precise timing of operations. Remember to not lose your concentration, and always start off with a patient mind :-)
In case you are wondering how I know what happens when you over/under-do something -- well, I've tried it out!!!! And wasted so much of my ingredients doing so.... In case your Mysore Pak has formed a burfi(won't solidity but has a smooth texture), all is not lost. You can still re-heat it (on a medium-low) flame, and keep stirring till you see forthing, and a molten-rock like texture of the mass. Turn off the heat, and let it solidify.
Note:
- The ghee has a higher boiling point than water, and hence is hotter than the sugar mixture(which at single-thread consistency is about 105C). Hence, it is able to cook the Besan better than the sugar mixture. If you use cool/room temperature ghee, you will have to wait for the mixture to become hot, and all the heat will be absorbed by the ghee instead of the Besan, and the Besan will be left under-cooked.
- Some people suggest using a 50% - 50% mixture of Vegetable Oil and Ghee instead of pure Ghee. DO NOT do that under any circumstances. I tried it, and it leaves quite a horrible after-taste of oil in your mouth. To bring out the real taste of Mysore Pak, use ONLY 100% Pune Cow's Ghee. Cow's Ghee is slightly yellow in colour, and I've had success with a brand called Dynamix. or make your own [1] [2] from Pure Butter.
- If you skip the roasting step, the Besan may not give off the proper taste.
- If the Ghee is not piping hot, the Besan will not get froth every time you pour the Ghee over it. This is Okay. However, it will take a while too cook the Mysore Pak, and you need to know how much Ghee to add in advance. The recipe will no longer dictate the amount of Ghee to be used. You will need to patiently cook the mixture on a medium flame. DO NOT use a high flame or you will burn the Mysore Pak, since Besan cooks very easily.
- Try to use a thick(18 gauge) stainless steel vessel in which to cook the Mysore Pak, since it will ensure equitable heat distribution and will not react with the mixture's contents. Using a larger pan(kadhai) will help, since it will help air the mixture.
Wednesday, March 05, 2008
Once bitten, twice backed.
Have you ever seriously thought about backing up your data? If not, chances are that you haven't been the victim of a system/hardware/disk failure. Most of the people who seriously think backing up their data and maintaining snapshots is an important part of their routine are the ones who have spent countless hours of their time trying to recover/rebuild their lost data after a system crash. Why does it require someone to suffer before they start becoming cautious with their precious data? Maybe the reason for it is; to quote from Shakespeare's The Merchant of Venice: "For sufferance is the badge of all our tribe".
Whatever, it may be, I would like to say that it's important to always back up your important data and protect it against system failure(s). In fact, I have set up an RAID-1(mirrored) array at home where I store my important data and my home directory. This way, even if one of my Hard Disks were to crash, I'd have the data safely backed up on the other one in the mirrored array. However, this solution does not prevent against:
To prevent against such problems, I'd want to have a separate backup(or preferably snapshotting) utility which saves versions of files as you save them. Ideally, the solution would be to introduce a surrogate file system such as a one written using the fuse file system, and have that file system save versions of the files as you save them. So, changes between an open() and close() on a file should be logged and saved as a file version. This way, the user will be able to recover files by how old it is and also get a fairly fine granularity control over the changes that happened. An optimization that could be done is to store only the changes to a file if only edits were made to it, whereas save a complete copy if the file size was changed.
I'm looking for more ideas and people interested in helping me develop such a solution, so if anyone is interested in helping out, please let me know and we'll try to work something out.
Whatever, it may be, I would like to say that it's important to always back up your important data and protect it against system failure(s). In fact, I have set up an RAID-1(mirrored) array at home where I store my important data and my home directory. This way, even if one of my Hard Disks were to crash, I'd have the data safely backed up on the other one in the mirrored array. However, this solution does not prevent against:
- Accidental file deletion,
- Accidental Disk formatting.
- File System corruption.
To prevent against such problems, I'd want to have a separate backup(or preferably snapshotting) utility which saves versions of files as you save them. Ideally, the solution would be to introduce a surrogate file system such as a one written using the fuse file system, and have that file system save versions of the files as you save them. So, changes between an open() and close() on a file should be logged and saved as a file version. This way, the user will be able to recover files by how old it is and also get a fairly fine granularity control over the changes that happened. An optimization that could be done is to store only the changes to a file if only edits were made to it, whereas save a complete copy if the file size was changed.
I'm looking for more ideas and people interested in helping me develop such a solution, so if anyone is interested in helping out, please let me know and we'll try to work something out.
Hacking after a very long time!!!!
After very many months did I finally get down to doing some actual hacking on a program that I wanted to fool into thinking it something else. Please note that I'm use the word work hacking in the true sense of the word, and not to illegally gain access to a system. Please read this page to get a low-down on that controversy.
Anyways, so there was this utility very similar to the UNIX cat utility that read in a file, and wrote it to some other location. However, this utility also performs a check to determine if:
Only if both the conditions are met does the utility go ahead with the task of creating the destination file. A special feature of this utility is that it will create sparse files if the source file contains many holes in it. So, it is not strictly required that the destination file system contain as much space as the source file size. Also, the second check is made to make sure that the destination file system supports sparse files. However, if we know that there is another file system which supports sparse files, we can do away with that check as well.
All said and done, I did not have the source code to the utility that I am talking about, so I decided to do something else. I used the LD_PRELOAD environment variable available on all Linux machines to load in a custom compiled shared object file which overrides system calls such as statfs(), statvfs() and ioctl() that are the typical calls used to get this sort of information from the underlying OS, and viola! there it was. My hooks worked, and I was able to see what was being returned for each request. The only thing I had to do was fool the program into thinking it was getting the information it needed to go ahead with the file conversion. That again was just a matter of inspecting and inserting the correct values for each over-ridden system call. the whole process took about 4hrs, but it was time well spent. It felt good to get back to doing this sort of hacking-programming after a while....
Anyways, so there was this utility very similar to the UNIX cat utility that read in a file, and wrote it to some other location. However, this utility also performs a check to determine if:
- There is sufficient space on the destination disk.
- The destination file is on a special file system
Only if both the conditions are met does the utility go ahead with the task of creating the destination file. A special feature of this utility is that it will create sparse files if the source file contains many holes in it. So, it is not strictly required that the destination file system contain as much space as the source file size. Also, the second check is made to make sure that the destination file system supports sparse files. However, if we know that there is another file system which supports sparse files, we can do away with that check as well.
All said and done, I did not have the source code to the utility that I am talking about, so I decided to do something else. I used the LD_PRELOAD environment variable available on all Linux machines to load in a custom compiled shared object file which overrides system calls such as statfs(), statvfs() and ioctl() that are the typical calls used to get this sort of information from the underlying OS, and viola! there it was. My hooks worked, and I was able to see what was being returned for each request. The only thing I had to do was fool the program into thinking it was getting the information it needed to go ahead with the file conversion. That again was just a matter of inspecting and inserting the correct values for each over-ridden system call. the whole process took about 4hrs, but it was time well spent. It felt good to get back to doing this sort of hacking-programming after a while....
Friday, February 29, 2008
A bug-fix.
I was writing a small php script to recursively delete all files and directories in a particular location that are more than a few hours old. I thought it wouldn't take more than 30min to do the whole thing. Additionally, I thought I'd use the Standard PHP Library(SPL) and the RecursiveDirectoryIterator class provided with it to implement directory scanning instead of the normal opendir(), readdir(), closedir() approach.
After writing the script, I tested it by making it spit out stuff saying Deleting file.... instead of actually making it delete any files/directories. The logic te script was used was that it checked the file/directory ctime which is the Inode Change time(not the file creation time as I earlier thought). Everything seemed to be working just fine when I uncommented the unlink() and rmdir() functions to test the real thing. Now, the script started saying different things, and wasn't even considering some directories for deletion. I was very surprised at this behaviour. I initially thought it was something to do with open directory handles or something, so went back to using the opendir(), readdir(), closedir() approach. However, even that approach yielded the same results. It's desperate times like these when you lose reason, and start to tinker with things which you know are not at fault in the hope of fixing the error. I inserted lots of debug output to be able to pin-point the error, but php kept saying that rmdir( was trying to delete a non-empty directory.
I'll give the directory structure below:
The output indicated that the file hello.txt was being deleted, but the directory zzz wasn't even being considered for deletion. Further, the script was trying to delete the non-empty directory aaa. I couldn't understand why this was happening. It was after some more brainstorming that I realized that the operation unlink() on the file hello.txt was changing the ctime for the directory zzz which meant that the directory zzz was no longer being considered for deletion. However, the ctime for aaa was staying unchanged. This was happening because I was calling filectime() while scanning the directory instead of pre-computing all the ctimes for all the files.
So, I now decided to use the scandir() function to get the directory contents at one go, and get their ctimes before doing any further processing on that directory such as recursive scanning or deletion of files/directories within that directory. This fixed the error, and the script now started exhibiting the expected behaviour. Even though this may look silly, there were many things I learnt from it; the most important being to make sure I know the side-effects of any action that I may perform.
After writing the script, I tested it by making it spit out stuff saying Deleting file.... instead of actually making it delete any files/directories. The logic te script was used was that it checked the file/directory ctime which is the Inode Change time(not the file creation time as I earlier thought). Everything seemed to be working just fine when I uncommented the unlink() and rmdir() functions to test the real thing. Now, the script started saying different things, and wasn't even considering some directories for deletion. I was very surprised at this behaviour. I initially thought it was something to do with open directory handles or something, so went back to using the opendir(), readdir(), closedir() approach. However, even that approach yielded the same results. It's desperate times like these when you lose reason, and start to tinker with things which you know are not at fault in the hope of fixing the error. I inserted lots of debug output to be able to pin-point the error, but php kept saying that rmdir( was trying to delete a non-empty directory.
I'll give the directory structure below:
.
`-- aaa
    `-- zzz
        `-- hello.txt

2 directories, 1 file
The output indicated that the file hello.txt was being deleted, but the directory zzz wasn't even being considered for deletion. Further, the script was trying to delete the non-empty directory aaa. I couldn't understand why this was happening. It was after some more brainstorming that I realized that the operation unlink() on the file hello.txt was changing the ctime for the directory zzz which meant that the directory zzz was no longer being considered for deletion. However, the ctime for aaa was staying unchanged. This was happening because I was calling filectime() while scanning the directory instead of pre-computing all the ctimes for all the files.
So, I now decided to use the scandir() function to get the directory contents at one go, and get their ctimes before doing any further processing on that directory such as recursive scanning or deletion of files/directories within that directory. This fixed the error, and the script now started exhibiting the expected behaviour. Even though this may look silly, there were many things I learnt from it; the most important being to make sure I know the side-effects of any action that I may perform.
Subscribe to:
Posts (Atom)